THE HOOKED FISH COMPANY
  • Home
  • Portfolio
  • Patterns for Sale
  • Blog
  • Contact

BLOG

April 2019 Update

4/22/2019

0 Comments

 
Finally, another blog post!
Picture
0 Comments

Constructing the Fish Shaped Pillow

10/12/2017

0 Comments


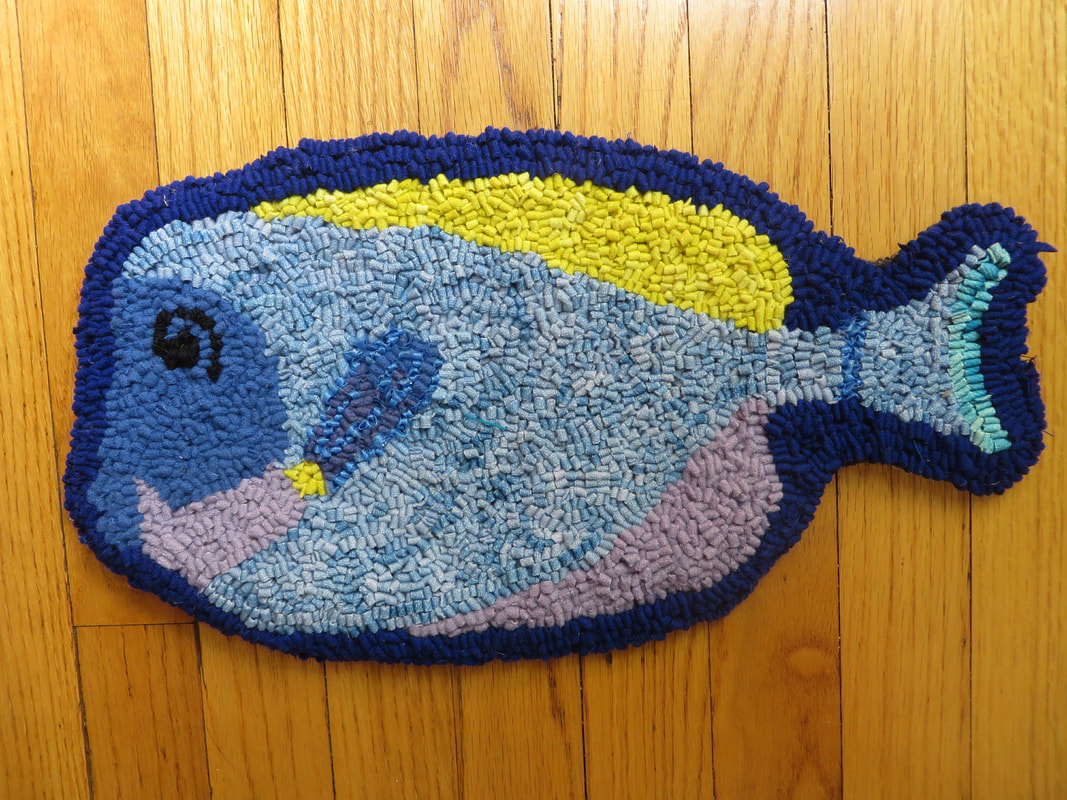
The Front of the Fish
  1. Hook the fish in colors of your choice.  Plaids, checks or textured wool add interest and texture to the fish.  Hook 2 or 3 rows around the fish with the wool you will use for the back of the fish pillow  
  2. Machine stitch around the fish close to the last row of hooking
  3. Trim the backing linen at least 1” from the last row of hooking
  4. Turn the excess linen under to the back
    Make perpendicular cuts so that the linen lays flat
  5. Press and steam the linen in place
  6. Steam your fish, back and front with a steam iron
 
The Back of the Fish
  1. Choose a coordinated plain, plaid or checked wool for the backing. Turn the hooked fish over and trace around the fish that you have hooked, onto the backing material with a black marker.
  2. Sew a line of stitching just outside the black line that you have drawn
  3. Cut away the excess fabric, leaving 1” around the black line for turning under
  4. Place the hooked fish on the fish backing, matching the front to the back
  5. Pin them together, turning the edge of the backing to the inside so that the line of stitching is folded under.Make perpendicular cuts in to the line of stitching so that the folded edge stays flat.Sew by hand the back to the front of the fish, leaving about 7” open at the bottom of the fish, so that you can stuff the pillow
  6. Stuff the pillow with commercial fiber filling (Craft stores carry this)
  7. Blind stitch the 7” opening
0 Comments

Your Fish Pattern

4/19/2017

0 Comments

 
This blog will address the construction of your fish pillow, with associated pictures.  Below is an example of the linen backing with the fish imprinted (Cod fish shown) on it.
Picture
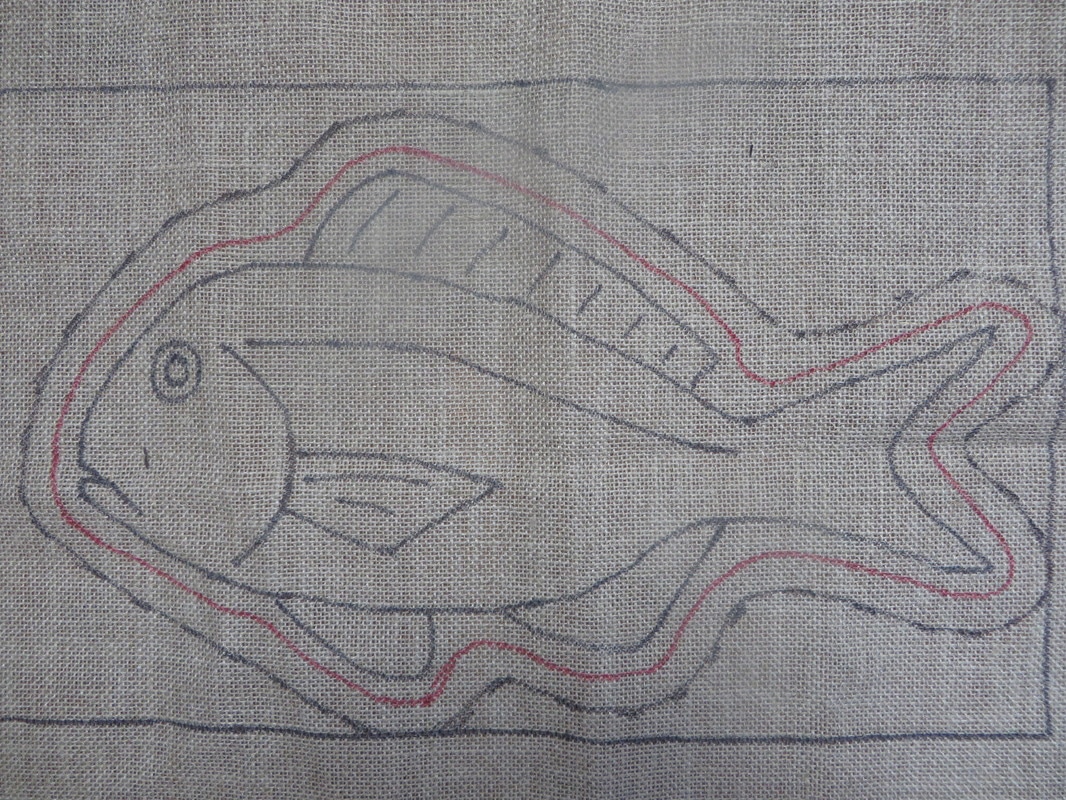
Step 1.  Hook the inside fish with your choice of fabrics.  If you are making a rectangular pillow, you need only to continue hooking the background, out to the outside edge.  You are now ready to finish your pillow. (See later step)
0 Comments

    Author

    I've been hooking for 10 years, and create my own designs. I belong to ATHA  and TIGHR.

    Archives

    October 2017
    April 2017

    Categories

    All

    RSS Feed

Powered by Create your own unique website with customizable templates.
  • Home
  • Portfolio
  • Patterns for Sale
  • Blog
  • Contact